How to Start a Christian Blog

Do you have an inspiring message you want to share with others, but you’re not sure how to get the word out?
Maybe you’re dreaming of publishing a book someday, but they want you to have a “platform.” Or maybe you simply want to write words of encouragement that will inspire women all over the globe.
If so, you need a website.
While sharing your thoughts, story, or mini-devotionals on social media sites like Facebook or Instagram is fine to start… Social media sites come with some serious limitations.
- You don’t own your content (the platform does).
- Your profile or page can be shut down, banned, hacked, or hidden by the algorithm at any time for any reason (and there isn’t much, if anything, you can do about it).
- Social media is noisy and distracting. Your heartfelt content has to compete with countless yummy recipes, celebrity gossip posts, silly dance trends, and funny cat videos.
- A big social media following *looks* nice, but social media followers are FAR less likely to actually buy anything from you (which is what we really want…).
With a website, on the other hand, you own your content. And you can do a lot more with it.
- On your website, your content isn’t competing with anyone else’s.
- You own all your content, and no one can take it away from you.
- You can write longer, more in-depth content, since people’s attention spans are better.
- You can optimize your content to be picked up by search engines.
- You can access detailed analytics so you know exactly what is (and isn’t) working.
- You have far greater control over your site’s design.
Sure, creating a website will cost a little time and money (a good website isn’t free), but owning a profitable website that truly helps people is absolutely worth the time and expense.
You can set up a beautiful website in as little as a few hours and for less than $20, and in this article I’m going to show you how.
No need to get overwhelmed watching countless Youtube videos that don’t really apply to what you’re trying to do. Simply bookmark this page, then follow the steps below.
Let’s get started!
Please note: This post contains affiliate links, which means if you make a purchase, I may make a small commission at no additional cost to you. This helps cover the many costs of running this site and allows me to help provide for my growing family. Thank you!
1. Purchase a Domain Name
First, you need to choose a name for your website so you can purchase the domain name.
Your website’s domain name is what people type into the top search bar of their internet browser to find your website. For example, “MonetizeMyMinistry.com” or “EquippingGodlyWomen.com.”
Every website must have a unique domain name, both so people can find your unique website and so you don’t infringe on anyone else’s trademark.
You *can* change your domain name later (in a process called “rebranding”), but it’s a huge pain in the backside, way more complicated than changing your social media handle. So you’ll want to take your time and choose just the right name from the start.
How to Choose a Domain Name:
1. Brainstorm Possible Name Ideas
First, start brainstorming possible name ideas. You want something unique, descriptive, and memorable, but not so “clever” that people won’t really understand what it means.
I came up with the name “Equipping Godly Women” while writing the about page for the website, after I found out that my original idea was taken. You can also use a website like PowerThesaurus.org to help you brainstorm great words and synonyms.
2. Make Sure the Name is Available
Second, do an online search to make sure the name (or a very similar name) isn’t already taken. Start by searching Google, Amazon, and the Trademark Electronic Search System (TESS).
Steer clear of domain names with a trademarked term in the title (such as Disney or Crock Pot), any “creative” spellings (PrayinMommas.com vs. PrayingMoms.com), and anything vague (BirdsandBlessings or LiveLaughLove).
Ideally, you’ll also want to avoid anything too long, as it will get cut off on your social media handles. (My websites don’t always pass this test!)
You’ll want to make sure the domain name and social media handles are available. The best way to do this is by checking a domain registrar like NameCheap.com for the domain name and the various social media sites for the handles you want.
3. Ask Friends and Family for Feedback
Third, ask friends and family for their honest feedback. Instruct them not to hold anything back! If your domain name is confusing, misleading, boring, difficult to remember, difficult to spell, or has any negative connotations, you want to know!
Should You Choose Your Name or a Keyword-Based Name?
One common question many new Christian authors and online content creators have is whether they should register their name (ex: SallySmith.com) or a keyword-based name (EquippingGodlyWomen.com).
The answer is: It depends on your goals.
Choose your name if: YOU are the brand. For example, you want to build YOUR personal platform as an author, speaker, coach, or consultant, and you want the flexibility to change topics and directions as needed. This is also a great option if you want a static website with just a few pages (about, speaking, contact, etc).
Examples: LysaTerkeurst.com, Asheritah.com, BrookeMcGlothlin.net
Choose a keyword-based name if: You’re creating a content-based niche site around a specific topic that isn’t you. This is a great option if you want to build a large website with tons of articles, if you want to build authority around a specific topic, or if you think you might sell someday.
Examples: FindingJoyinYourHome.com, TheIntentionalMom.com, BrilliantBusinessMoms.com
How to Purchase a Domain Name Through Namecheap:
My favorite place to purchase a domain name is NameCheap.com. The process is super easy, and it typically costs less than $10-12 to secure your domain name.
- Visit NameCheap.com and search to make sure your domain name is available. (You almost always want the .com version, since that’s what people will type automatically.)
- Double check that everything is spelled correctly, then click “Add to Cart.”
- You do NOT need a SSL, WordPress hosting, Web hosting, Social Media Manager, VPN, Business email, Premium DNS, or SiteLock. Many of these will be provided by your host (or you can add them later).
- Click “Check out”
- I always choose Domain Privacy and auto-renew on both Domain Registration and Domain Privacy. Otherwise, the name and address you register may be listed publicly on the web.
- Click “Confirm order” and create your account.
- Once you’ve successfully purchased your name and created an account, you’ll receive a confirmation email.
2. Purchase Hosting
Next, you’ll want to purchase hosting. Hosting is basically paying for the server space where your website data is stored online so others can access it.
While you *can* purchase your domain name and hosting from the same place, I don’t recommend it. While it’s incredibly rare, if one goes down, you still have access to the other.
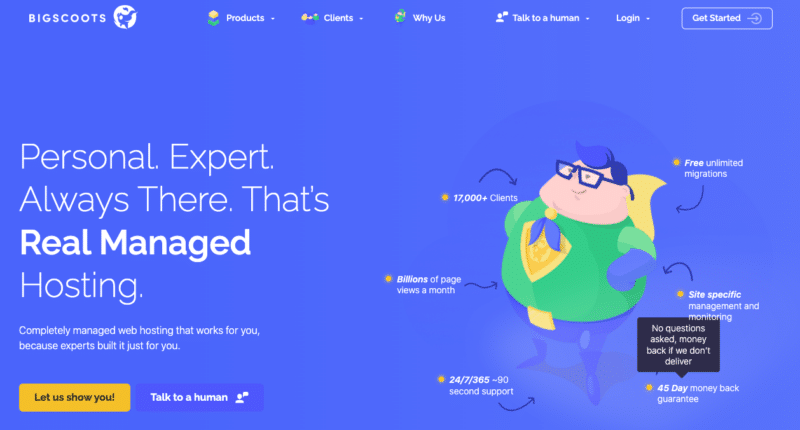
There are lots of places you can purchase hosting online, but I highly recommend BigScoots. They have phenomenal customer service, they’re very affordable, they have very little downtime, and you can stay with them as you grow (unlike the other “budget” options).
How to Purchase Hosting Through BigScoots:
- Visit BigScoots.com and navigate to Products > Web Hosting > Shared.
- You probably want the 105cc or 150cc shared web hosting plan, if you’re just getting started.
- Choose “Monthly” or “Annual” billing, then click “Get this.”
- On the next screen, choose “I already own a domain” and fill in your domain name.
- Click continue.
- If you have ANY questions, concerns, or troubles, click “Talk to a Human” from the Bigscoots website and they’ll get you all taken care of! (This is why I recommend BigScoots!)
- You’ll eventually need an SSL certificate (this gives you https:// instead of http://) and a domain-specific email address ([email protected]), and BigScoots can help you get that set up as well.
- Once you purchase your plan, you’ll receive an email with links and instructions.
3. Connect Your Domain Name and Hosting
Now that you have a domain name and hosting from two different companies, we need to connect them. This way, when someone types in your domain name, it will take them to where your website is hosted online. Thankfully, the process is super simple.
How to Connect BigScoots and NameCheap:
- Log into your Namecheap account. Once logged into your dashboard select “Domain List” on the left menu.
- Choose the domain you’re wanting to adjust the Name Servers (DNS) for, and click the “Manage” button to the right of the domain.
- Click the up arrow to drop down the Nameservers menu, and select “Custom.”
- Enter your nameservers (BigScoots will tell you what they are) in the 2 fields below the Custom dropdown menu.
- Once done, click the green check mark to save.
This process can take a few hours so just be patient. 😁 If you still don’t have a connection within 24 hours, reach out to customer service at Namecheap.
4. Install WordPress on Your Website
There are TONS of options when it comes to what type of content management system (CMS) you use to build your website: Wix, Shopify, Squarespace…
But my favorite is WordPress, and I’m not alone. Over 1/3 of the ENTIRE internet is powered with WordPress. Not only does it offer a TON of functionality, but because it’s so popular, it’s easy to get help and support.
If you’re creating a small, static website (with an about page, a speaking page, a contact page and not much else), then you can probably use something like Squarespace. BUT if you want a larger, more robust website with lots of articles, you definitely want WordPress.
Note: WordPress.com and WordPress.org are NOT the same thing. Do NOT go to WordPress.com and sign up for an account there. That is a blogging platform where they own your content – not what you want.
Most hosts offer a “one-click install” for WordPress that makes it super simple to install. When I purchased hosting from BigScoots, they installed WordPress for me and then sent an email with login information. Easy!
This process can take a few hours so just be patient. Simply type your website URL into your browser every so often until you see something pop up. If you still don’t have a connection within 24 hours, reach out to customer service at BigScoots.
While you’re waiting, you can contact BigScoots and make sure you have an SSL certificate and custom domain email set up. You can set up your social media accounts, or you can skip down to step 7 and start browsing themes while you wait. Just come back here when it’s ready.
5. Get Logged In
Once your website is live, it’s time to log in and start setting things up! You can access the backend of your website by visiting:
yourwebsitename.com/wp-admin
Your hosting company should email you information on your default login. You’ll want to change this to something unique to you. You can always change, add, or update your login from your hosting account or through the backend of your website, using the URL above.
Note: Your username WILL display publicly. Most people use their first (or first and last) name.
6. Change WordPress Default Settings
Once you’ve logged into your new WordPress, there are several default features that need to be edited. In the left-hand sidebar, choose “Settings,” then go through each page and fill out all the information you have.
Most of the settings will be self-explanatory or up to your personal preferences, but here are a few you may have questions on:
General Settings:
- Membership: Uncheck “anyone can register.” You don’t need people registering to your site in this way. You will eventually need an email list, but this is different and not needed.
Reading:
- Your homepage displays: I like to build a static page (and you’ll eventually want one too), but simply listing your latest blog posts is a-okay to start.
- For each post in a feed, include: I would choose “excerpt.”
- Search engine visibility: Do NOT select “Discourage search engines from indexing this site” unless you don’t want your site shown in Google, for some reason.
Discussion:
- Do select “Attempt to notify any blogs linked to from the post.”
- You can select “Allow link notifications from other blogs…” if you want a comment notification when someone links to you. You do have to regularly delete the spam, though.
- Do select “Comment author must fill out name and email.”
- Do NOT select “Users must be registered and logged in to comment” (We turned that feature off).
Permalinks:
Important! You will NOT want to change your link structure later on, or it WILL result in broken links. Choose with care, and plan to stick with it.
I use “Custom Structure” on Equipping Godly Women so my category is in the URL. This makes for very long links and means I have to stick to just a few categories I can’t rename. But EGW has a LOT of content, so using this structure helps me feel more organized (and I can sort my long list of URLs into categories super easily).
Example: https://equippinggodlywomen.com/faith/best-bible-studies-for-women
I chose “Post Name” for Monetize My Ministry, because I plan to have a lot less content and categories that aren’t as clearly defined, so having the category in the URL felt unnecessary.
Either “Post Name” or “Custom Structure” will work. But I would strongly recommend against “plain, day and name, month and name, and numeric,” as your URLs will quickly look ugly, messy, or outdated.
7. Install Your Theme
Your website “theme” is basically the template (really, a collection of files) that determine what all of the pages and posts on your website will look like.
By default, WordPress comes with a few themes pre-installed, but they’re pretty generic and boring. Most people choose a new theme that better matches their personality and their vision for the site.
How to Choose a Theme
- Consider the overall “feel” you want your site to have: Professional? Pretty? Minimalist?
- Consider the purpose of your site: Will you publish tons of articles or will your website be more like a business card/hub for your books, speaking, coaching, and more?
- How much customization do you want to do? Do you want something “ready to go” or do you want to make it your own?
- Do you want ongoing support and updates?
Where to Buy a Theme
I purchased my first theme on Etsy. It was very pretty and affordable, but it didn’t come with updates. I purchased another inexpensive theme from ThemeForest, which is still a good option.
Currently, Equipping Godly Women is built with Thrive Architect, an easy drag-and-drop landing page builder I chose because it’s super inexpensive and easy to use. As a user, I love it. But the code is really bloated and slows my site down, so I plan to move away from it soon.
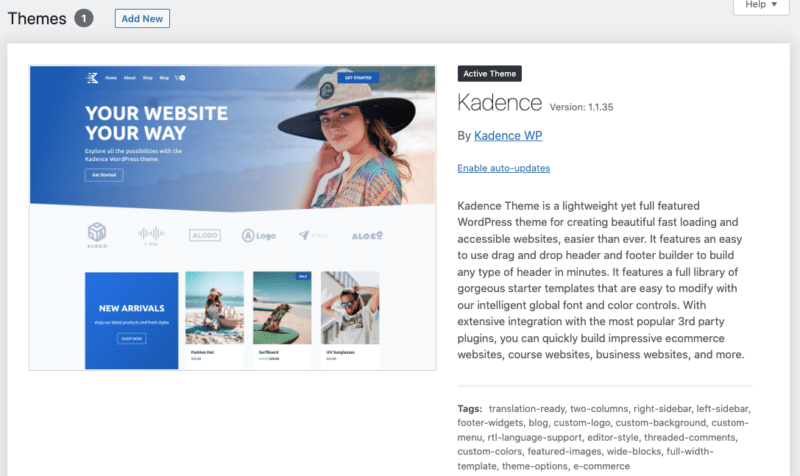
One super popular option these days is Kadence. I built Monetize My Ministry using the free version of Kadence with a child theme I purchased from Katy Boykin.
Kadence is great because it’s lightweight, fast, easy-to-use, and free! If you start with a basic Kadence theme, you can then add a “child theme” or additional blocks you purchase in order to customize your theme just the way you like.
If you go this route, I would highly recommend joining Katy Boykin’s DIY Dream Site. It’s a membership that comes with TONS of templates and support to make building your site from scratch easy and affordable. (I’ve been building and running websites for 10 years now, and I still find her membership very helpful!)
You can install the free version of Kadence from the Kadence website or right from your WordPress dashboard by visiting “Appearance” in the left-hand sidebar. Then choose Themes, and click the button that says, “Add new.” Search for Kadence and click the blue “Install” button.
Lastly, be sure to click “activate” so the theme goes live. You can also delete any default WordPress themes while you’re there. You won’t need them once you install a new theme.
Do You Need a Custom Theme?
As your website grows, you may eventually want to hire a designer to build you a custom theme. This route can easily cost several thousand dollars, however, so I typically would not recommended starting here.
When you are ready for a custom theme, three designers I would recommend include: KatyBoykin, PixelMeDesigns, and AnchoredDesign.
8. Customize Your Theme
Now for the fun part! Once you get your website theme installed and activated, you get to start clicking around and making things your own.
When you’re viewing the homepage of your website (while logged in), click “Customize” on the toolbar at the top. Additionally, you can click “Appearance” on the left sidebar in your WordPress dashboard. This will allow you to change your fonts, colors, text, and more! Simply click through all your options!
Fonts: You’ll want to stick to just a few basic fonts; otherwise, your site will look messy and unprofessional. I typically choose one serif + one sans serif.
You may also choose to stick with “system fonts” (fonts that come preloaded on most devices) if you want a lightning fast site. This isn’t a big deal with small sites, but becomes important if you’re running Facebook ads or trying to optimize your ad revenue from display ads.
Colors: I chose the colors for Monetize My Ministry by uploading the feature image on the homepage to ImageColorPicker.com and choosing a few colors. You can find a ton of ideas on the Design Seeds Instagram Page. Be sure to read this helpful article on branding colors as well.
Images: Do NOT simply copy/paste images you see on Google, Amazon, or other websites. These are copyrighted and you cannot use them without permission.
If you don’t want to take your own images (I don’t), you need to use a reputable stock photography site. Free stock photography sites include: Pixabay.com, Unsplash, and Pexels. Personally, I use Lightstock and DepositPhotos.
Kadence offers a TON of flexibility if you want to design your entire website yourself, but be careful not to get too bogged down getting everything “just right.”
As you learn and grow, your website will naturally evolve over time. You will want to make lots of changes over the years, and if you design your site yourself, you always can. No need to get it all 100% perfect on day one.
Note: See the video above for a fantastic deep-dive into everything you can do with Kadence.
9. Install Necessary Plugins
Out of the box, WordPress is pretty basic. You can add posts, pages, images, and comments… but not a lot more. That’s where plugins come in.
A “plugin” is a group of files you install (plug in) on your website to add additional functionality.
There are a few essential plugins that every website should have. After these, you’ll simply add plugins as you need additional functionality. Keep in mind, though: The more plugins you have, the slower your website will load.
Most plugins are free. Some offer optional paid upgrades, but you shouldn’t need to pay for anything to get started. Start with the free versions, and upgrade later if you need to.
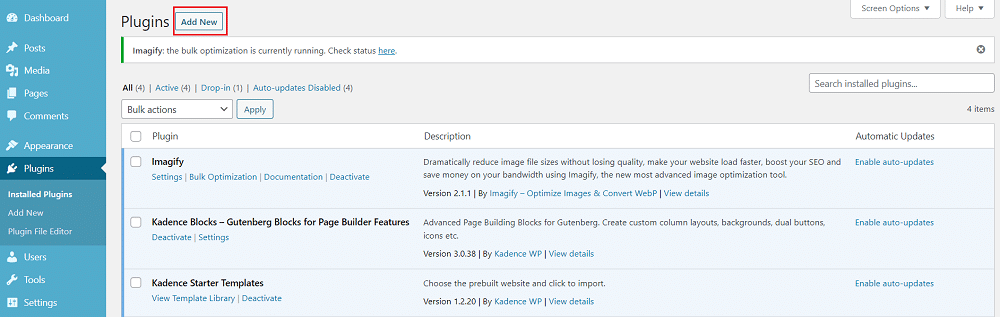
How to Add Plugins to Your WordPress Website:
- Log in to your WordPress admin dashboard (yourwebsitename.com/wp-admin)
- Locate “Plugins” on the left-side menu and click “Add new”
- Search for the plugin name in the search box located on the right side
- Click “Install Now” and then “Activate”
- Most plugins require a bit of set up (changing some settings), but each one is different. You can usually find these settings in the main plugin page or in the left-hand sidebar, sometimes buried under a heading.
Must-Have Plugins
- Imagify: This plugin compresses your image file sizes upon upload to free up space on your website and optimize for speed.
- Wordfence Security: This plugin keeps your site secure with “set it and forget it” anti-virus, firewall, and malware scans.
- WP Rocket: This cache plugin stores a copy of your website on the server, helping your site load way faster.
Optional Plugins
- Akismet Anti-Spam: This plugin is the best anti-spam protection to block spam comments and spam in a contact form. It’s free for personal sites but paid for sites that make money.
- GDPR Cookie Consent: If you have visitors from the EU or California, you’ll want to make sure your website follows cookie compliance laws. This IS a paid plugin, but it’s pretty cheap.
- Kadence Blocks: If you installed the Kadence theme, you may have one or more Kadence plugins already added to your site.
- Yoast SEO or Rank Math SEO: These plugins help you optimize your posts to be picked up in Google Search. Essential if you’re focusing on SEO.
- Smash Balloon Instagram Feed: This plugin displays your Instagram feed on your website.
- WPForms Lite: This free plugin will add a simple contact form to your website if your theme doesn’t come with one already.
- Yoast Duplicate Post: If you create a lot of similar landing pages (for multiple courses, etc), this plugin makes it super simple to duplicate any page with one click.
10. Customize or Create Your Required Pages
Once you’ve chosen your website framework, your template, it’s time to get to work creating the actual pages of your site.
Some themes, like Kadence, do offer starter templates that make it very easy to simply add your information to existing pages. Others require (or allow) you to create pages from scratch.
Must-Have Pages
1. Home Page
This is the front, main page of your website — what people first see when they type your domain name in their browser. This can be a static page or a reverse chronological list of posts.
A list of posts is perfectly fine to start, when your website doesn’t have much else, but eventually you’ll want to build a beautiful landing page that helps people know what your site is about, who it’s for, and what they’ll find there.
When creating your homepage, be sure to look at lots of sites for inspiration — both those in your same niche and in others. What sites do you love? What do they all have in common?
Examples: MoneySavingMom.com, LivingWellSpendingLess.com, AlliWorthington.com, TonyRobbins.com, Cure.org, Northpoint.org
2. About Page:
Similar to your home page, your about page helps your readers know what your site is about, who it’s for, and what they’ll find there, but you can go much more in-depth. You can also add a personalized section with “fun facts” and another invitation or call-to-action.
Examples: EquippingGodlyWomen.com, NikiHardy.com, EricaWiggenhorn.com, AmyPorterfield.com, SmartPassiveIncome.com
3. Contact Page:
Your contact page will likely include a contact form (you may need a plugin for this), your email address if you want it displayed publicly, and answers to any FAQs to help cut down on unnecessary email.
4. Privacy Policy & Disclosure Page:
Whether you put your privacy policy, disclosures, and terms and conditions on the same page or seperate pages, you need this information publicly available on your website. Thankfully, there are TONS of free online templates you can use, like Termly.com. Just select whatever applies to you.
Additional Pages
1. Blog:
If you plan on regularly publishing content, in addition to your blog posts, you’ll likely have a page that lists all your recent posts. This page doesn’t typically get a ton of traffic (unless it’s also your homepage). You can customize this, but I wouldn’t obsess over getting it “just right.”
2. Service Pages
If you plan on selling any books, courses, or printables from your site or if you plan on offering coaching, speaking, or sponsored advertising, you may want specific landing pages for these. You don’t have to create them until you need them, though.
3. Confirmation Pages
Similarly, you may eventually need “confirmation” pages for people to land on after they’ve purchased something or signed up for something. You don’t need to create these until you need them, though.
How to Add a Page to Your Website:
- From your WordPress admin dashboard, click on “Pages” in the left sidebar, and then “Add New.”
- If you are using the Kadence theme you should immediately be able to start creating and editing this page. Choose a title and start designing!
- Make sure to hit “Publish” so your page is live.
11. Create a Logo (Optional)
You may not “need” a logo when you’re first creating your website, but eventually, you will.
If you like designing things yourself, you can use a website like Canva to design your logo. Otherwise, you can hire someone else to create a beautiful, yet very inexpensive, logo for you on Fiverr. (That’s what I plan to do.)
You will want something that looks great, but again, this IS something you can update later, so don’t waste time obsessing over the perfect logo.
Remember: Less is more. Your logo should be simple, clear, recognizable, adaptable, and timeless. It should look great both large and small, and you’ll probably want versions for both light and dark backgrounds.
12. Set Up Google Analytics
One of the many benefits of having a website is the ability to see what content resonates with your viewers and track where people are going within your pages or posts. In order to do this, you’ll need to set up Google Analytics.
How to Install Google Analytics in WordPress
Note: Google discontinued and switched from the previous “Universal Analytics” to “Google Analytics (GA4)” in mid-2023. If you read a tutorial online, make sure you get a GA4 account.
- First, create a Google account you want to use for your website, such as [email protected]. You’ll use this account to access your analytics.
- Then, visit analytics.google.com and start going through the process of creating a GA4 account. This article from SEMRush will show you how to set up a Google analytics account.
- Copy/Paste Method: I prefer to simply paste the code into the header of my website. If your theme lets you easily add a bit of code to a “header” section that you can access in the settings, this is my preferred method. Here’s how to do this with Kadence Pro.
- Plugin Method: If your theme doesn’t have an easy way to add code into the header section (this is NOT the same as copy/pasting it into a page) or if you’re worried you’re going to break something, you can add Google analytics with the plugin MonsterInsights.
Because your website is brand new, there might not be a lot of data to track within the first couple of months. But you still want to get it up and running as soon as possible.
In the future, when you want to apply for an ad network, get sponsored post deals, sign a book contract, or be considered for other partnerships, you’ll need to know how many pageviews you have, on average.
How to Exclude Internal Traffic from GA4
Of course, most of the traffic you DO get in those early days will be you working on your own website. Here’s how to exclude your own traffic from Google Analytics for more accurate data.
How to Check Your Traffic
While you *can* install a plugin (like jetpack) to let you see your Google analytics right within your WordPress dashboard, I don’t recommend it. Jetpack is notoriously bulky and will slow your website down.
Instead, simply go to analytics.google.com to see how many website visitors you have, where they’re coming from, which pages they’re visiting, how long they’re sticking around, and more.
13. Set Up Automatic Site Back-Ups
While it’s rare, you never know when a plugin on your site might cause an issue, you might get hacked, or you might break something. For this reason, you’ll want to run regular back-ups.
Some hosting companies provide automatic site back-ups with some of their plans, so check with them first. If your host doesn’t provide back-ups, you can also back up your site using a plugin called Updraft Plus. This article will show you how.
With this plugin, you can send a backup of your website to a storage location of your choice (Dropbox, Google Drive, etc.) Simply locate this plugin on your WordPress site and activate it.
If you’re regularly publishing new content, I recommend weekly (or even daily) backups to start. If you rarely update your website, monthly backups are just fine.
Please do NOT skip this step! Having a backup of your website gives you peace of mind and also makes sure your website is never out of service to your audience.
That’s it!
This list is extensive, but not exhaustive. Hopefully, you’ve been able to create a great Christian website on WordPress with the knowledge provided. Give yourself a huge pat on the back. This was a lot of work, but you did it!